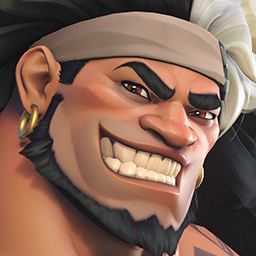
🛡️ 1. Spawn Fight (First Choke Hold)
Primary Goal: Delay enemies early, burn cooldowns, build ult charge.
Positioning:
Place Mauga just behind cover to the left of spawn doors (if defending from attacker’s POV).
Use his Overrun to force back early dives and suppress snipers or flankers trying to peek.
Tips:
Pair with a support like Illari or Baptiste for sustained healing.
Use Cardiac Overdrive to mitigate early poke and help supports build ult charge fast.
🌉 2. Bridge Fight (Mid High-Ground Control)
Primary Goal: Control the bridge and punish overextensions.
Positioning:
Set up on the high ground just before the bridge, around corners or pillars.
Use overwatch angles and suppress with primary fire. Tap-fire at longer ranges to keep pressure up.
Tactics:
Drop off the high ground if you’re being dove, pull enemies into your team’s crossfire.
Use Overrun to disrupt enemies trying to take control of bridge space.
🪧 3. Point A Defence (Courtyard to First Cap)
Primary Goal: Anchor your team around Point A’s courtyard area.
Positioning:
Hold the tight corner entrance just before the point.
Use the statue and walls for LOS blocks.
Tips:
Fire in bursts to sustain your ammo pool.
Call out flanks—especially from the balcony up top or right-side stairs.
🚪 4. Gate Choke (After Point A)
Primary Goal: Re-establish hold immediately after first cap.
Positioning:
Use the archway just after the gate as a chokepoint.
Pair with crowd control or zoning ults like Mei, Sigma, or Sojourn Disruptor Shot.
Tips:
Your Cardiac Overdrive can keep allies alive during tight spam windows here.
Drop Incendiary Cleave (if available) to zone hard corners.
🛣️ 5. Narrow Road Hold (Alley Before Flank Path Opens)
Primary Goal: Maximize damage and delay through tight alley.
Positioning:
Play corner angles to keep fire pressure up while minimizing damage intake.
Use vertical high ground (if available) to scout flank attempts.
Team Coordination:
Supports play far back near exit side.
DPS (e.g. Ashe, Hanzo) can watch for high ground threats.
🔄 6. Flank Path to Point 2 (Pre-Cap Zone)
Primary Goal: Watch for late flanks and stagger attempts.
Positioning:
Watch the right-side tunnel and elevated flank path that leads to the back of Point B.
Rotate quickly if enemies split.
Tips:
Overrun can help Mauga get back to point fast if it’s a bait push.
Ultimate (Cage Fight) is extremely valuable here for locking a flank group out or punishing a split engage.
 Circuit Royal
 S3lect
 Ilios
Ilios
 Dootybooty
 Paraíso
 pizzabot
 Rialto
 bertmerps
 Shambali Monastery
 bladee
 Numbani
 みく
みく
 Route 66

 Dootybooty
 Ilios
Ilios
 bertmerps
 Nepal
Nepal
 cantaim
 Numbani
 Shadowabbyss
