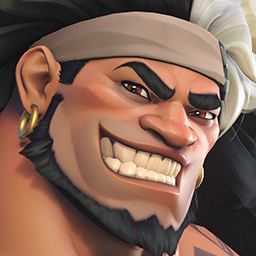
Implement a non-traditional defense by avoiding fights on the payload and instead contesting the enemy team near their spawn, leveraging Mauga's strengths in sustained firepower, area denial, and self-sustain.
🎯 Strategy Overview
Avoid Payload: Fighting on the payload often results in tight, chaotic engagements that limit Mauga's mobility and AoE control. The payload also moves, reducing the predictability of your engagement zones.
Pressure Spawn Entrances: Position yourself and your team just outside enemy spawn exits, especially at chokepoints. Junkertown’s first and third phases offer narrow exit paths ideal for this.
Deny Setups: Prevent the enemy team from properly grouping up or establishing a front line. Force them to take staggered fights.
💣 Mauga’s Role in This Strat
✅ Key Responsibilities:
Hold aggressive positions near enemy spawn—ideally on high ground or corners.
Burn tanks and soft targets with Chainguns—maximize pressure and prevent regrouping.
Use Overrun (Shift) to chase isolated targets or interrupt early formations.
Trigger Berserker passive to sustain longer up front without support.
Avoid overextending into spawn doors—pull back to a mid-range control zone when needed.
❗ Don’ts:
Don’t camp spawn doors directly—risk of spawn invulnerability & overextension.
Don’t hold on payload—let the enemy push it slightly if needed; your win condition is bleeding their time.
📊 Supporting Stats From Match
From your match screenshot:
Overrun Kills: 12 — confirms success in isolating enemies before they group.
Damage: 7,549 — efficient output given defensive aggression.
Critical Hit Damage: 2,593 — effective target focus.
Self-Healing: 1,077 — confirms Mauga’s sustainability in aggressive frontline plays.
🧠 Team Coordination Tips
Brigitte (Gnome): Excellent synergy — armor packs + stun zones.
Hitscans (e.g., KENNYISCOOL2): Hold sightlines near spawn to punish peeks.
Avoid splitting — team should anchor around Mauga’s zone for momentum.
📌 Conclusion: Tactical Dominance Through Spawn Lock
By refusing to contest the payload directly and instead turning the tables with aggressive forward defense, you:
Shattered the enemy's rhythm.
Denied their regroup efforts.
Controlled the map, not just the objective.
This is a high-risk, high-reward strategy best used with coordinated teammates and strong positional awareness. Mauga thrives in this setup due to his ability to apply unrelenting pressure and survive without full support.
 Midtown
 raptoracaeli
 Esperança
 Django
 Suravasa
 Django
 Blizzard World
 lumia?
 Rialto
 Django
 New Queen Street
 Django
 New Junk City

 Django
 Samoa
Samoa
 Django
 King's Row
 Django
 Aatlis

 Django


